(Introduction writeup TK)
Shake it up
In the sandbox page, scroll down to the section tiled, The Shakes. It looks something like this:
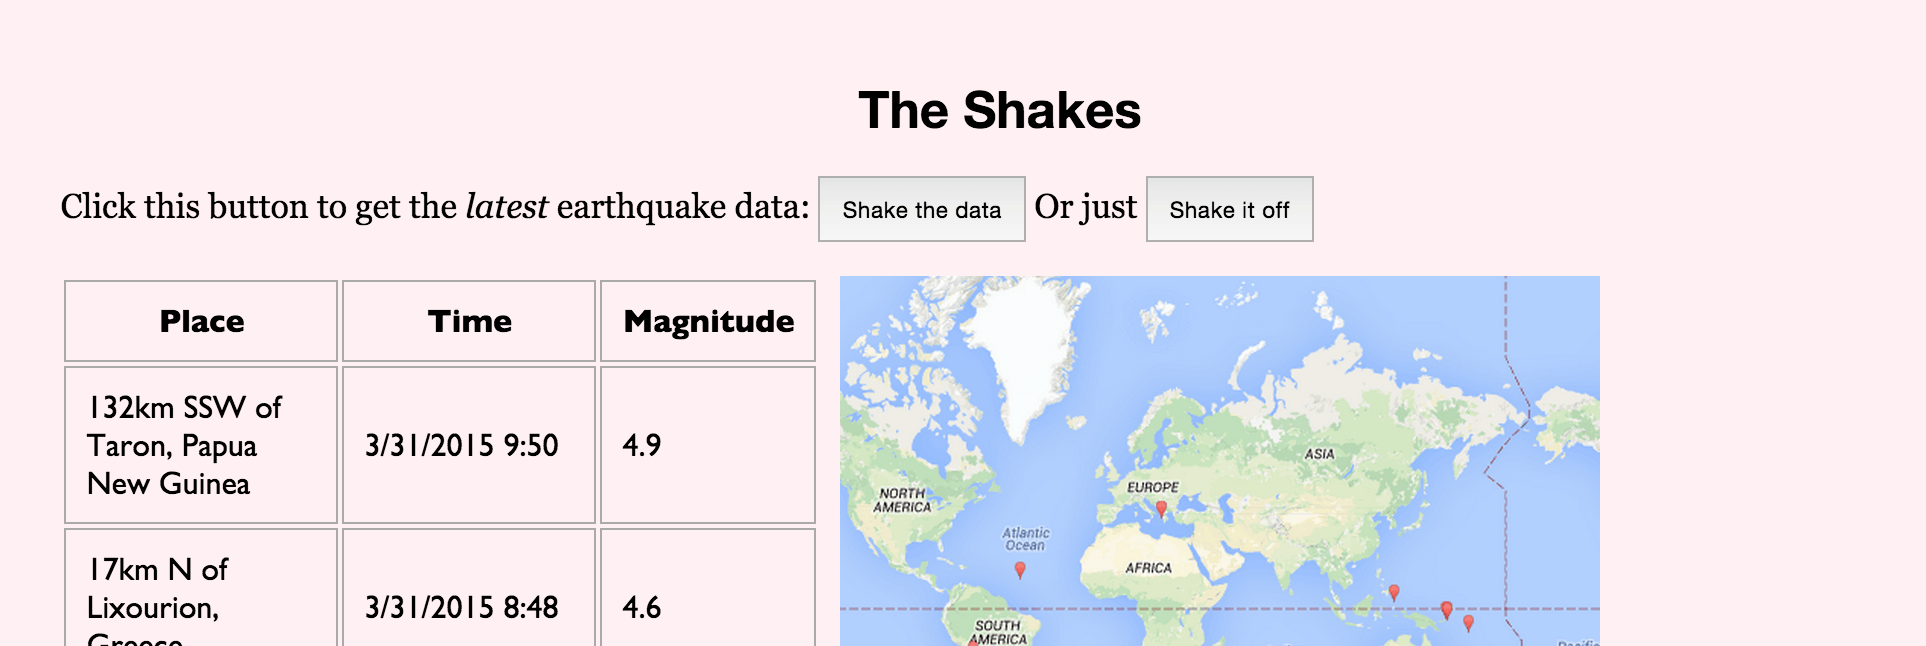
The data table and static Google Maps image display 4.5+ magnitude earthquake incidents from the USGS Earthquake Hazards Program.
For the purposes of the sandbox page, I've hard-coded the table and Google map (i.e. it's just part of the plain, static HTML) to show incidents in the data feed on March 31. If you wanted to scrape the table of this data, the Python code would look like this:
import requests
import bs4
response = requests.get('http://www.compjour.org/files/pages/web-inspector/a')
soup = bs4.BeautifulSoup(response.text)
for row in soup.select('table#earthquakes tbody tr'):
    print(", ".join([cell.text for cell in row.select('td')]))
However, I've also created a JavaScript-powered button – "Shake the data" – to replace the table and Google Maps image with new HTML code that contains the up-to-the-minute data from the USGS.
The JavaScript button works by fetching the JSON file at this URL.
But pretend didn't know that. You can use the Network Panel to see the data request that occurs when pressing the button. First, clear the Network traffic panel so that it's empty. Then, press the button (don't mind the shaking; that's just a JavaScript animation effect I threw in for kicks, not a direct result of retrieving data from the USGS):
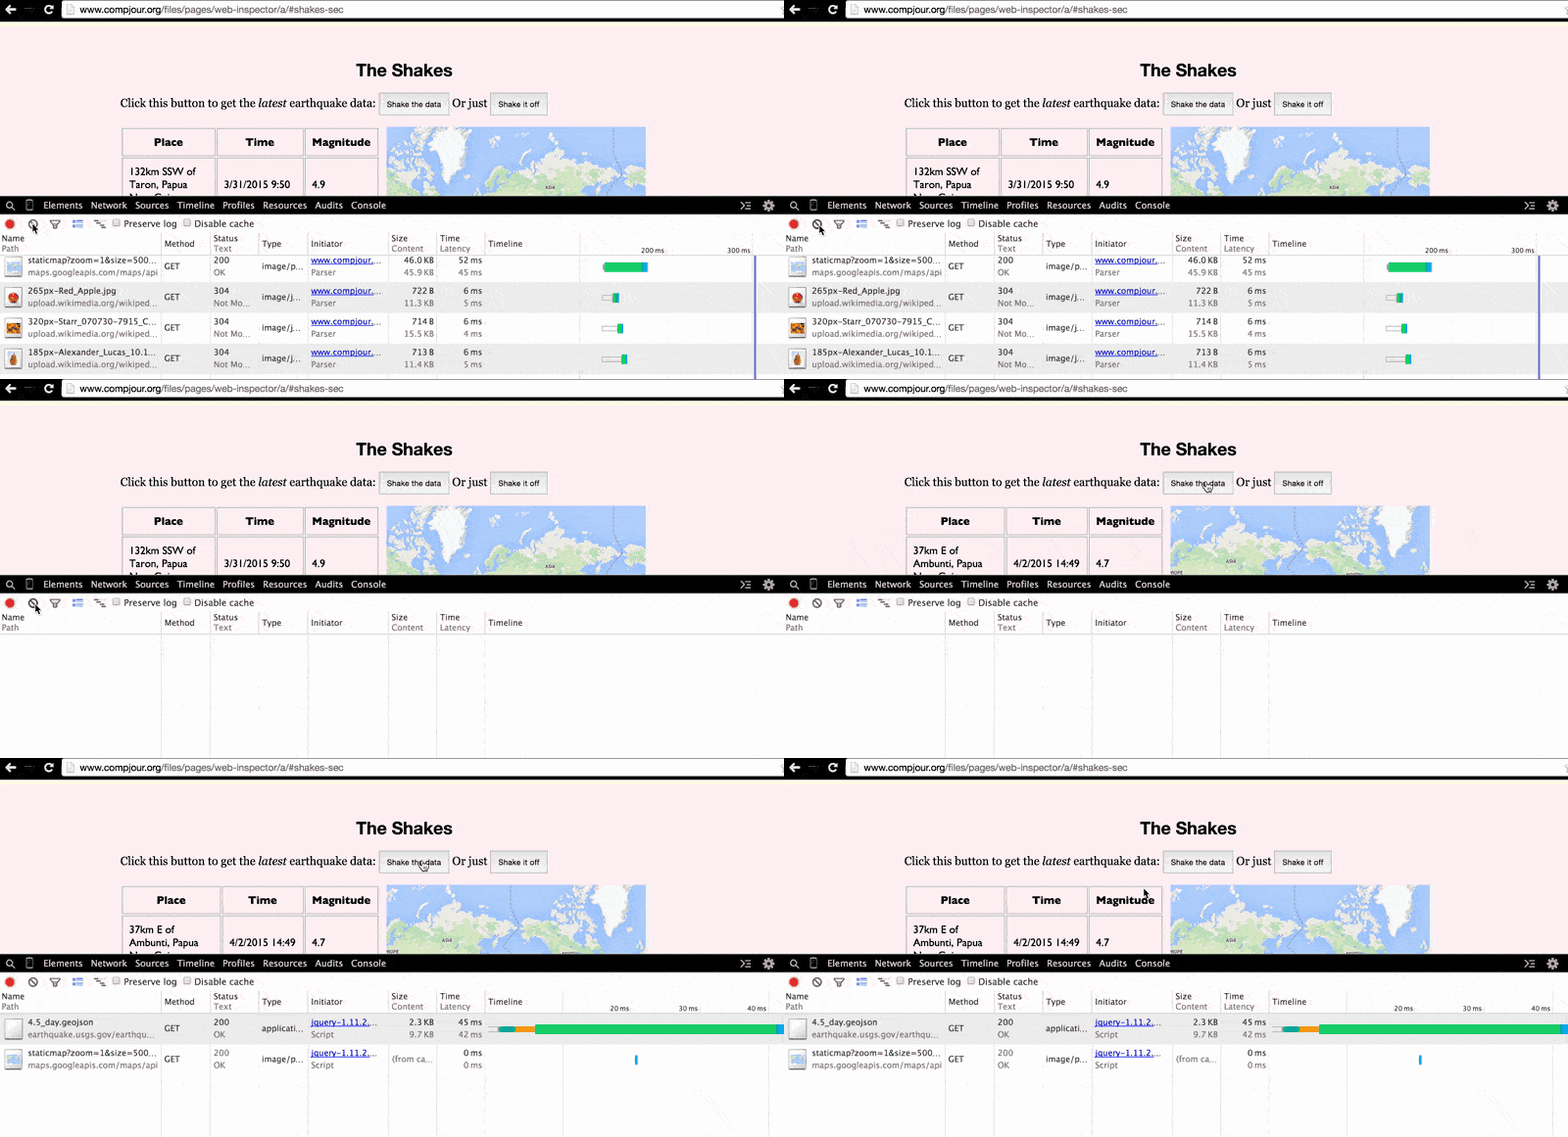
Two new GET requests are made by the browser, one to earthquake.usgs.gov for the 4.5_day.geojson file and the other to the maps.googleapis.com/maps/api/staticmap endpoint.
The Network Resource Details Pane
You can view the USGS 4.5_day.geojson file by pasting the URL directly in your browser's address bar. Or, you can view the details of the file by clicking on it, which will bring up the Network Resource Details pane.
In the Network Resource Details pane, the two most interesting tabs are Headers and Response, which show, respectively, the details of the browser's request and the raw contents of the file. Clicking on the x in the top-left corner of the pane returns you to the Network Panel's default traffic view:
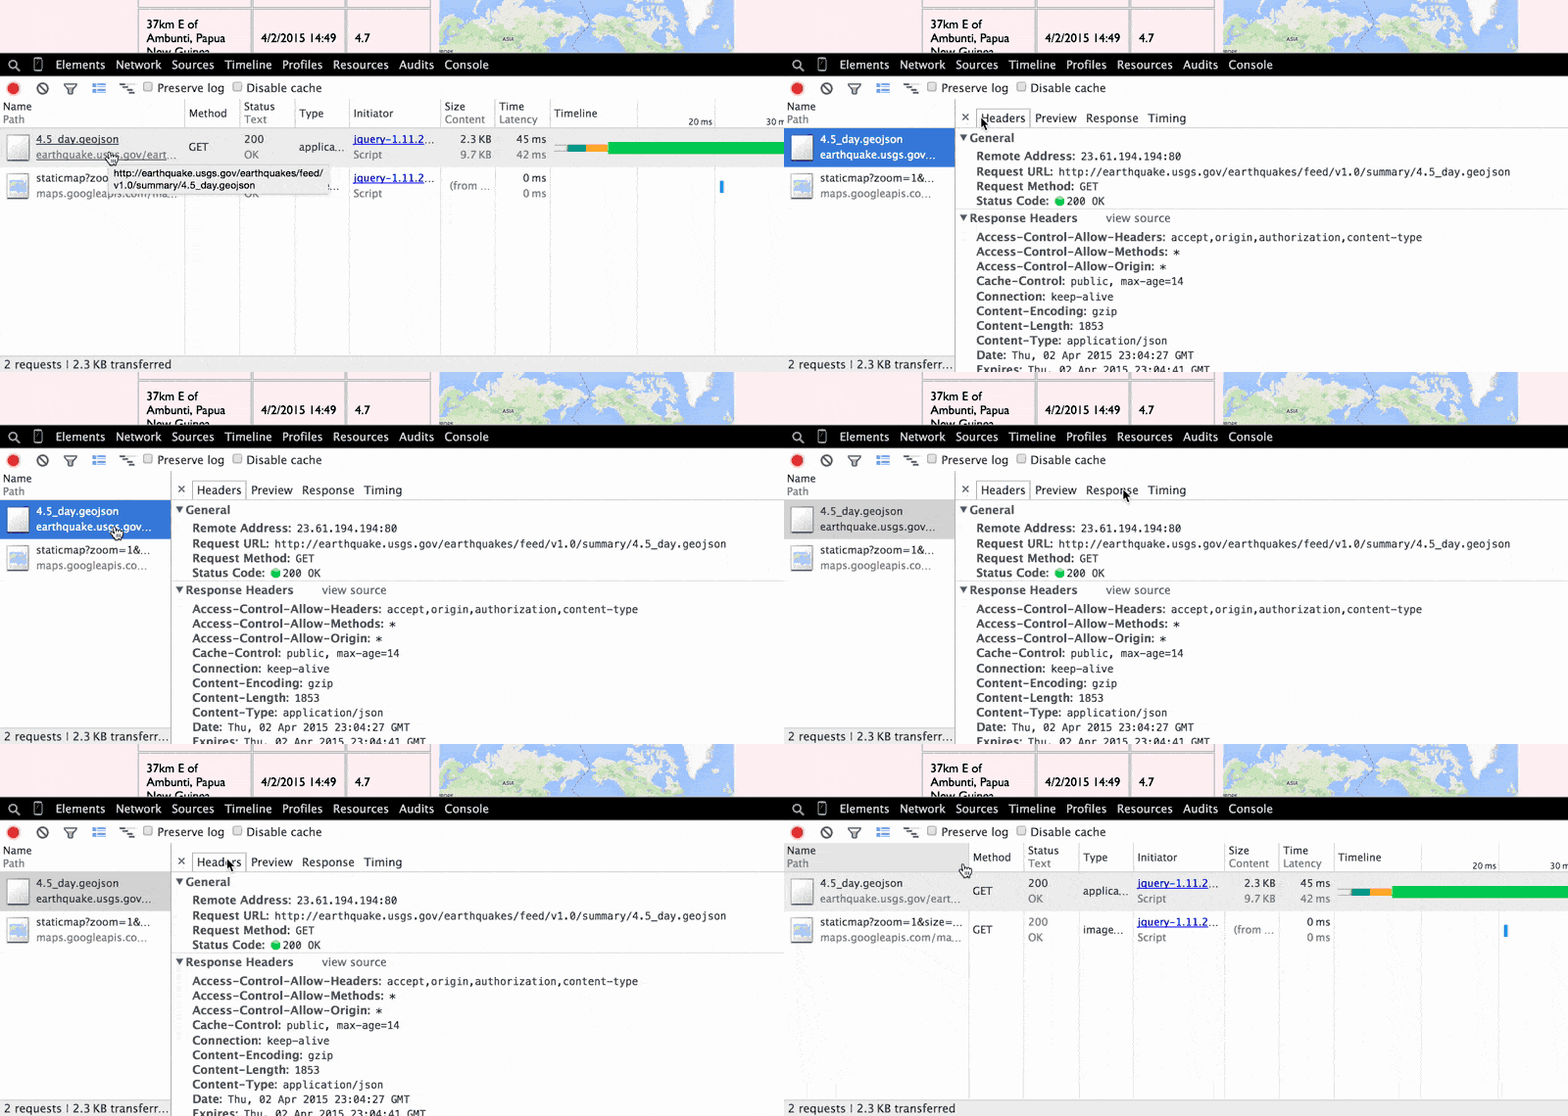
The Headers tab
The Response tab is pretty straightforward, but the Headers tab contains useful information about the _metadata exchanged between your browser and the USGS webserver, so let's take a closer look at it:
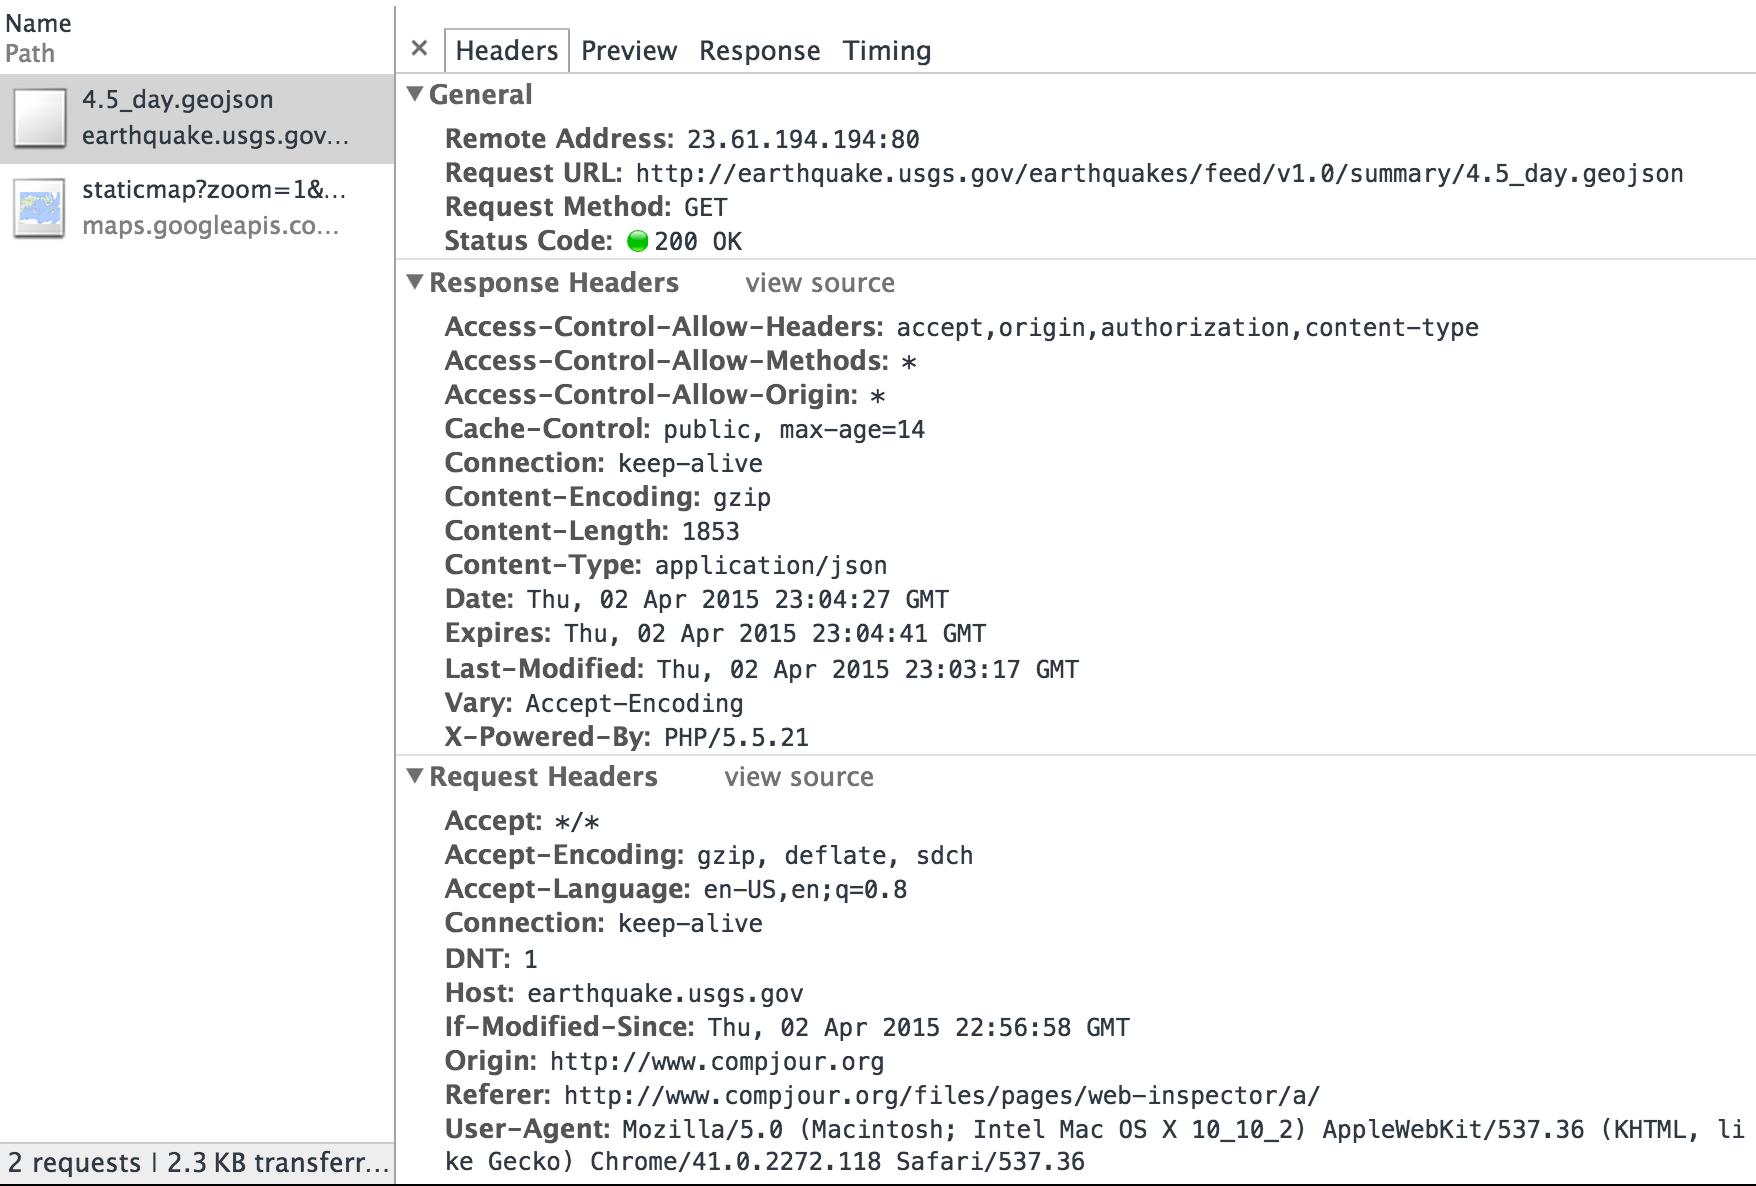
The Headers tab contains several subsections of headers: General, Response Headers, and Request Headers. None of these are particularly exciting in this example, but it's worth noticing the kind of details that you learn about the USGS webserver, and what it learns about your browser. For example, in the Response headers, the USGS webserver tells us that it runs on PHP/5.5.21 (according to the X-Powered-By property) and that the content it's sending was Last-Modified at Thu, 02 Apr 2015 23:03:17 GMT. My browser, in the Request Headers, has told it that the referring address (i.e. where the request for data was initiated) is "http://www.compjour.org/files/pages/web-inspector/a/" and that my computer's operating system is Mac OS X 10_10_2.
A sidenote: it's also worth noting that this metadata can be faked. Whoever wrote the USGS website code could've made up the Last-Modified date. And similarly, if I write a Python script to request the data, I could program it to have a User-Agent of Web Browser From The FUTURE!.
Request/Response headers for a Google Map
The Static Google Maps request contains more interesting headers.
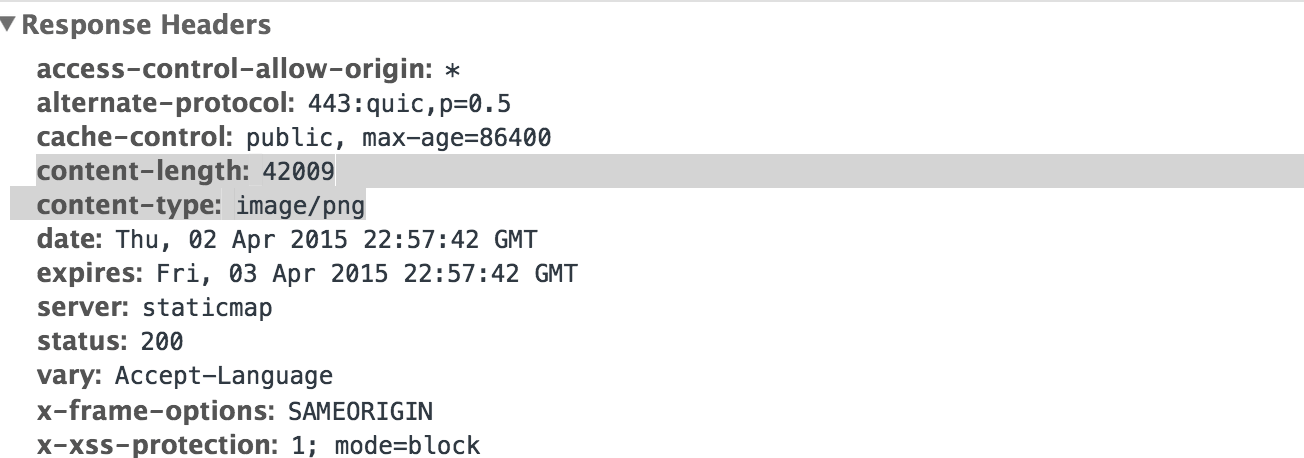
In the Response Headers from Google, the content-type property tells our browser that the data is not text, but image/png; this is how the browser knows to render it as an image, rather than displaying it as raw binary text. And the content-length tells us that the image file itself is around 42,000 bytes:
Query String Parameters
The Google Static Maps API works by reading a string of data parameters in the request URL. For example, to generate the following image:
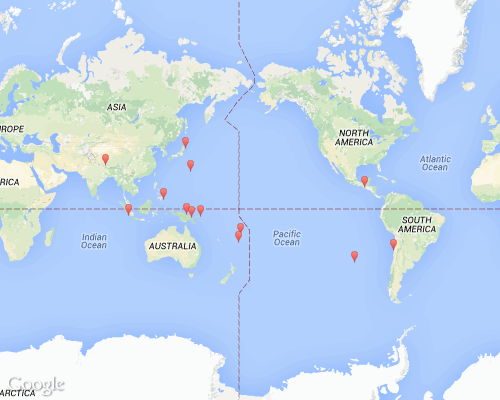
– this is the URL:
https://maps.googleapis.com/maps/api/staticmap?zoom=1&size=500x400&markers=size:tiny%7C-4.2721,143.1799&markers=size:tiny%7C-6.4291,146.9467&markers=size:tiny%7C38.6112,142.0651&markers=size:tiny%7C-35.5184,-98.7841&markers=size:tiny%7C-23.127,179.3652&markers=size:tiny%7C24.9652,145.9352&markers=size:tiny%7C6.5259,126.784&markers=size:tiny%7C-5.5064,152.6745&markers=size:tiny%7C-28.511,-71.1538&markers=size:tiny%7C-17.8368,-178.6629&markers=size:tiny%7C-4.5718,102.5482&markers=size:tiny%7C28.7119,86.3512&markers=size:tiny%7C14.8081,-91.454
This Query String Parameters subpane contains a more user-friendly format of those URL parameters:
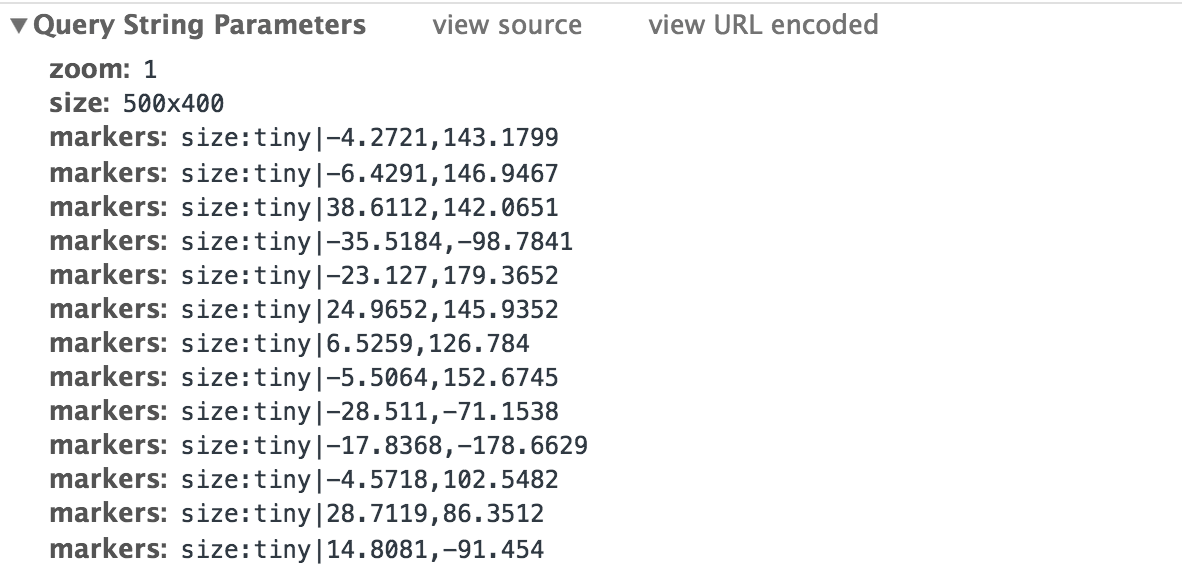
These parameters are defined in Google's documentation of the Static Maps API. In the screencapture below, I show how the output of the Google Maps server changes as I add parameter key-value pairs to the URL (note that key-value pairs are separated by the ampersand symbol, &):
size=600x100(thesizeparameter is required)zoom=6center=Stanford,CAmaptype=hybrid
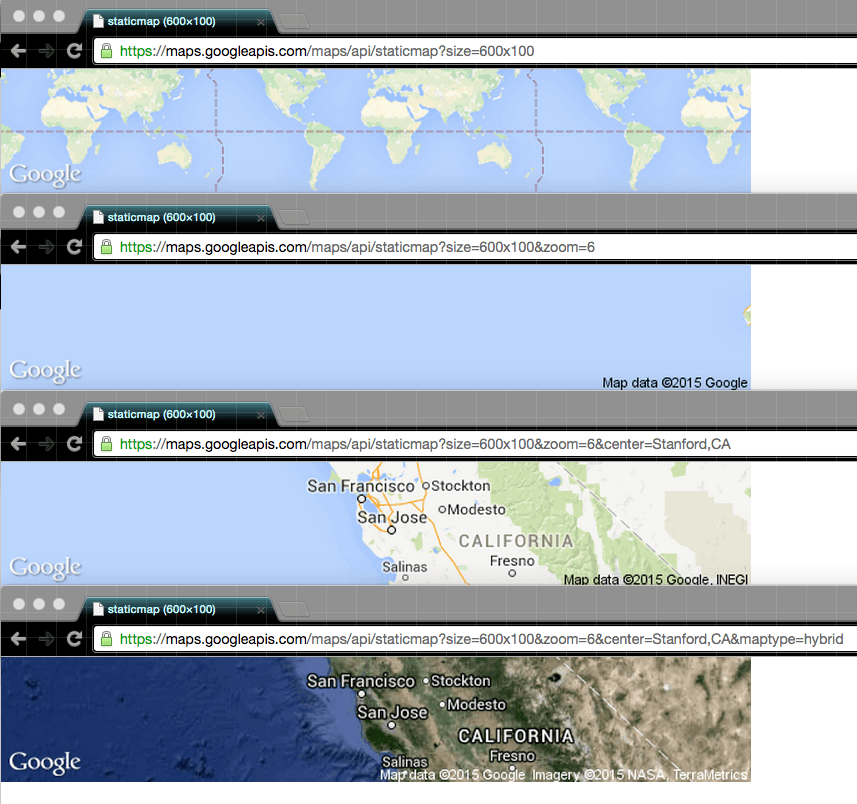
Learning all about the Hypertext Transfer Protocol (i.e. HTTP) is beyond the scope of this tutorial (here's the Wikipedia entry for the Query string). However, it's worth knowing that when your browser makes a specific request for data – via a direct URL or through a web form that you submit with a button – a set of properties and values – i.e. data – is sent to the server, in this case, Google Maps. And on that server is a program that reads those parameters and sends back the customized request.
And with the Network Panel's Resource Details Pane and Headers tab, we have an easy way to examine these parameters, which is very helpful when we skip using the browser and write our own scripts to access web resources.