In the previous lesson, I advised you not to spend too much time trying to memorize HTML tags and attributes. Part of this is because it's easier just to learn as you go in tandem with the DevTools inspector. And part of it is because HTML tags themselves – whether it's <em> for italicized text, <b> for bold_, or even <small> for reduced-size font – do not actually describe what their corresponding elements will look like in the browser.
Instead, web browsers use another language, referred to as CSS, short for Cascading Style Sheets, to determine the visual appearance of HTML elements.
I'll repeat my previous advice: it's not worth memorizing the expansive syntax (CSS is a language, after all). But it is worth knowing the concept, and how to interactively explore and debug it with the Chrome DevTools.
Knowing about CSS isn't particularly essential for the data-programming domain, but it is extremely essential if you intend on publishing any kind of webpage.
And for web-scraping tasks, the concept of CSS selectors will be an important takeaway from this lesson.
Introduction to CSS
The CSS syntax, in general, looks something like this:
some_selector{
  some-visual-property: the-value;
  another-visual-property: another-value;
}
The following snippet would render h1 elements (h1 is the tag used for a top-level headline) as green, italicized text using the [Comic Sans font](http://en.wikipedia.org/wiki/Comic_Sans:
h1{
  color: green;
  font-family: "Comic Sans MS";
  font-style: italic;
}
In the snippet above:
h1is the selectorcolor,font-family, andfont-styleare the propertiesgreen,"Comic Sans MS", anditalicare the respective values for the given properties
External stylesheets
This style code is usually saved in another file (referred to as an external stylesheet), and a webpage can tell the browser to include that stylesheet via this bit of HTML:
<link rel="stylesheet" href="/path/to/those-styles.css">
There's a lot more to CSS, including what the Cascading part means. For now, it's enough to know that when it comes to web pages, there's a whole other language for defining the look of HTML elements on a page. The fact that these styles can be defined in external files means that there is a separation of concerns, specifically, separating the content of a webpage (the text, the multimedia) from its presentation.
This separation of concerns is an important concept in all kinds of programming, and the use of CSS is one of the best real-world examples of how it works. So let's dive into a little CSS using the Chrome DevTools.
For this lesson, we'll be using the test page at this URL:
http://www.compjour.org/files/pages/web-inspector/inline/
The Styles Pane
As we learned in the previous lesson, the Elements panel can be opened up by right-clicking on any HTML element and selecting Inspect Element.
The Styles Pane is the right-half of the Elements panel. I usually resize the panel so that the DOM Tree Pane takes up 60% of the overall panel, as HTML code tends to be longer in line-length than the style code:
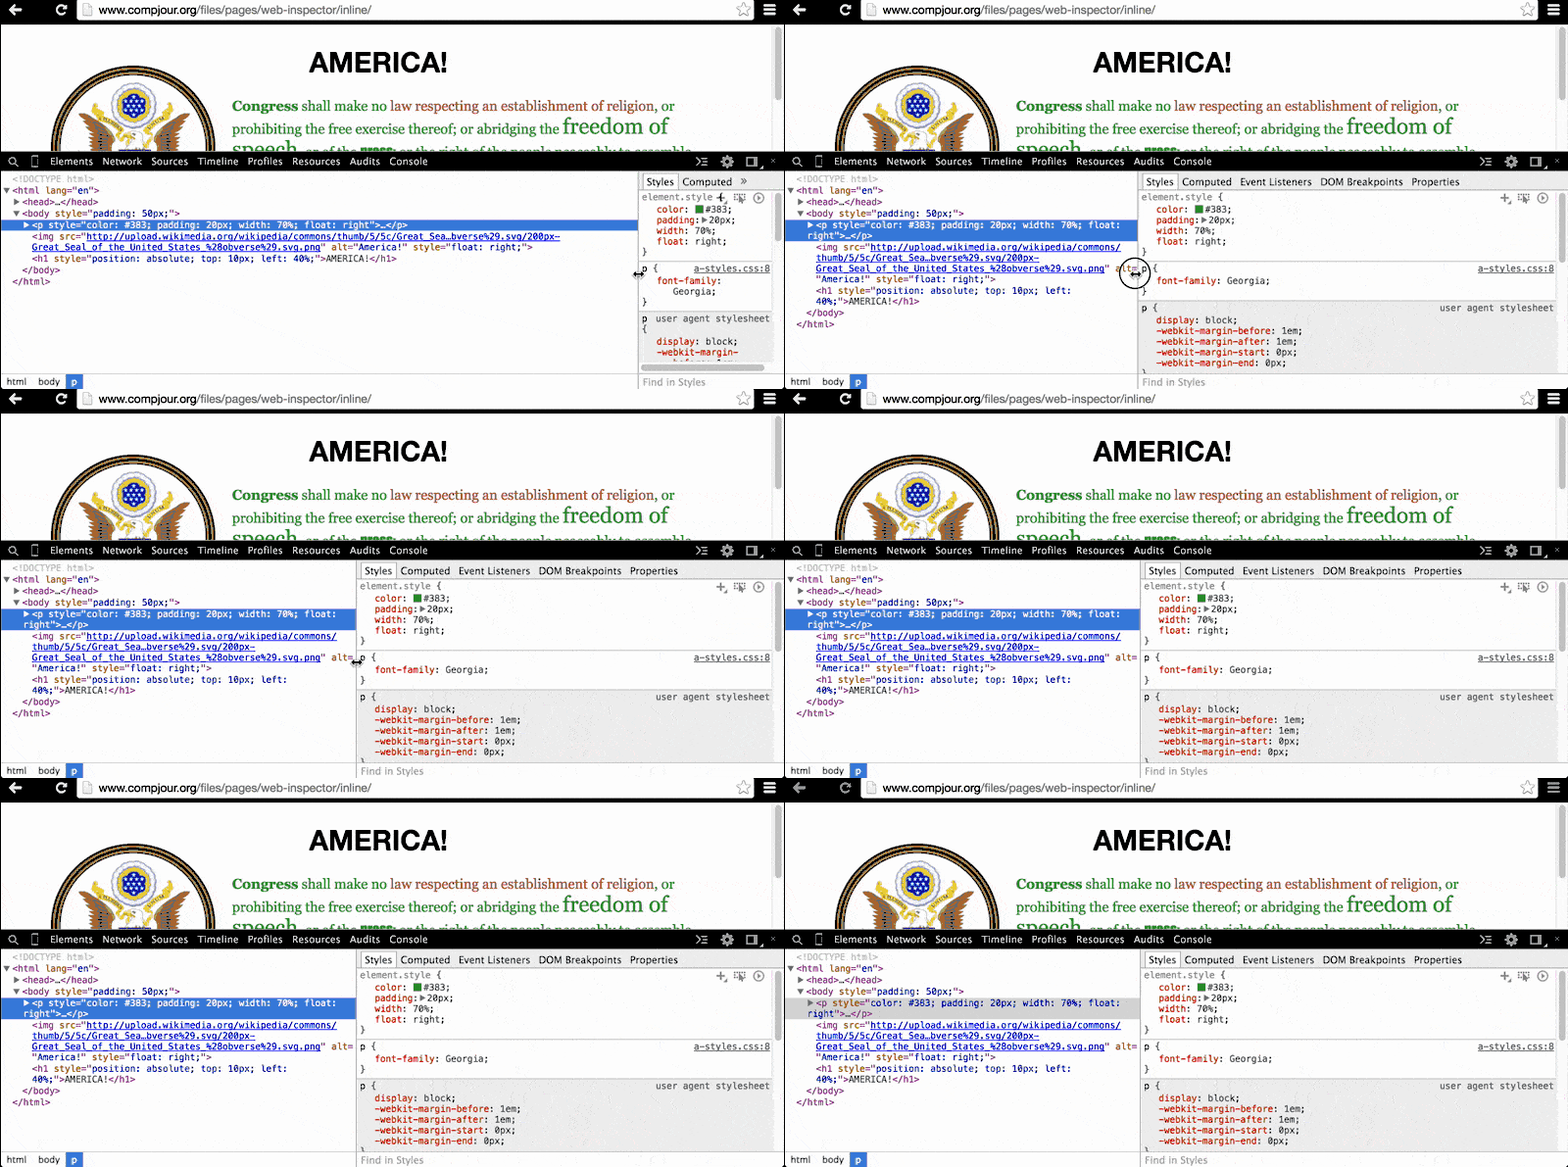
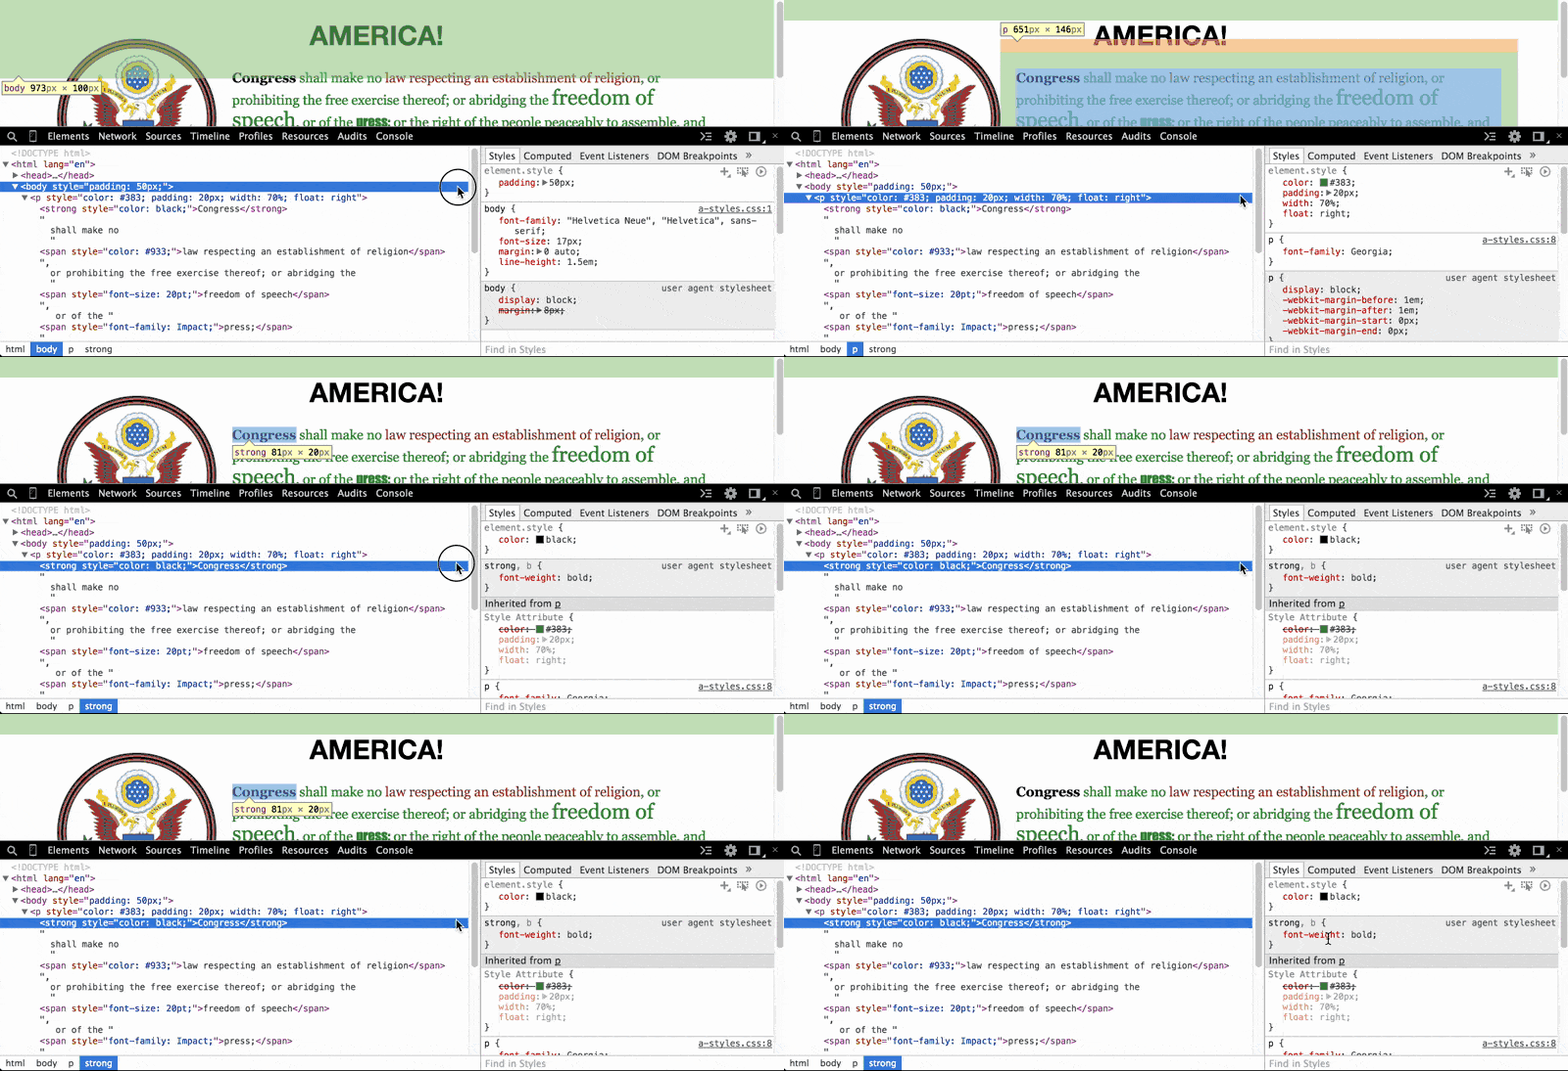
As you click through the HTML elements on the left pane, notice how the right pane changes.
Inline CSS
Clicking on the <body> element reveals a list of style codes that affect the <body> element's visual presentation. The top-most style states that the specific element (i.e. element.style) has a padding value of 50px, i.e. the browser is instructed to put 50px of whitespace around the <body> element (and its children elements):

Where did that style come from? If you look back in the DOM Tree, you'll see that the <body> element has an attribute named style:
<body style="padding: 50px;">
Throwing in style code into HTML style attributes is known as inline CSS, and it is not recommended. I use it here just to keep the examples simple, but remember that the point of CSS is to separate presentation (e.g. padding: 50px) from the content (e.g. the <body> element and its children)
Linking to an external stylesheet:
The second listed style refers to the body element, and in the top-right corner of this section of code, there's a reference to a-styles.css:1. This tells us that the CSS in this snippet comes from an external style sheet:

If you look through the DOM Tree and expand the <head> tag, you'll see an HTML element that instructs the browser to fetch a specific CSS file and apply its styles to the webpage:
<link href="/files/pages/web-inspector/assets/a-styles.css" rel="stylesheet">
The URL in the href is relative to the page's domain; its absolute value is:
http://www.compjour.org/files/pages/web-inspector/assets/a-styles.css
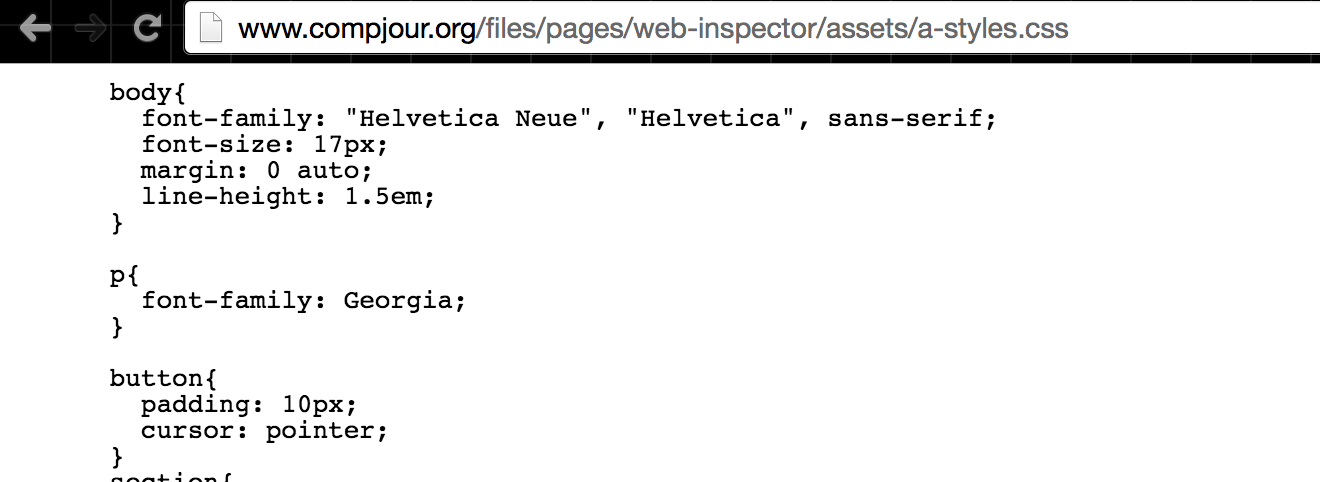
Visiting that URL will open up the CSS file. Remember that just because the browser can open and display a file from a URL (such as an image), it doesn't mean that what it displays is actually HTML; a CSS file is just plaintext:
Interactively switching out the styles
One of the best features of the brower's devtools is how it lets us tinker with the code of a webpage and see the result of the change without having to reload the webpage.
In the paragraph element (i.e. the <p> tag), do you wonder what the page would look like without that ugly green-colored text? Just click on the <p> element and then, in the Styles Pane, deselect the color attribute, which has been set to #383:
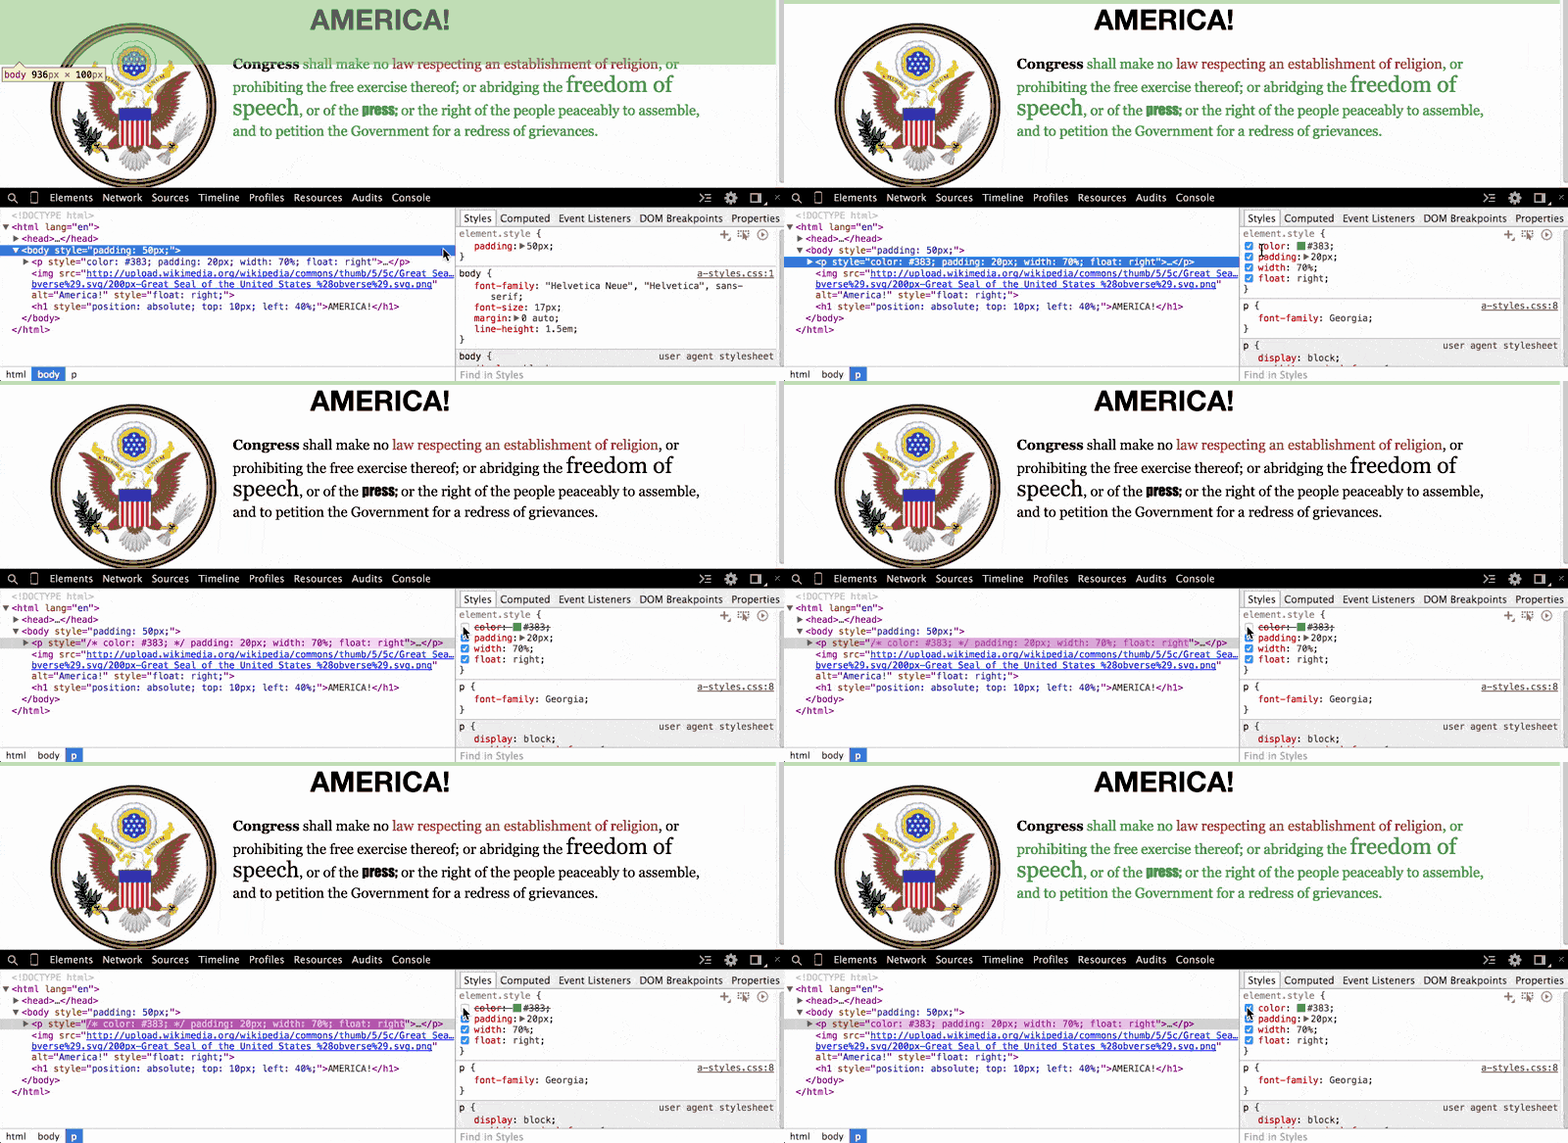
When we uncheck that color property, the browser looks for the next style code that refers to the color of text for paragraph elements. In this case, the next relevant style code (and it may be the default of the browser) is to render paragraph text as black.
Check out the other inline styles of this wacky test page, which I've deliberately designed with worst practices to illustrate the interaction between CSS and HTML. For example, look at the headline of AMERICA!. The browser renders it at the beginning of the page, so you might assume that the headline element is before both the image and the paragraph elements.
However, if you inspect the DOM tree, you'll see that the <h1> element is actually the last element on the page. So why is it rendered at the beginning? Notice the inline style I've given it. Then, look in the Styles Paine and uncheck the corresponding properties to see where the <h1> element would be placed if browsers displayed HTML elements in sequential order:
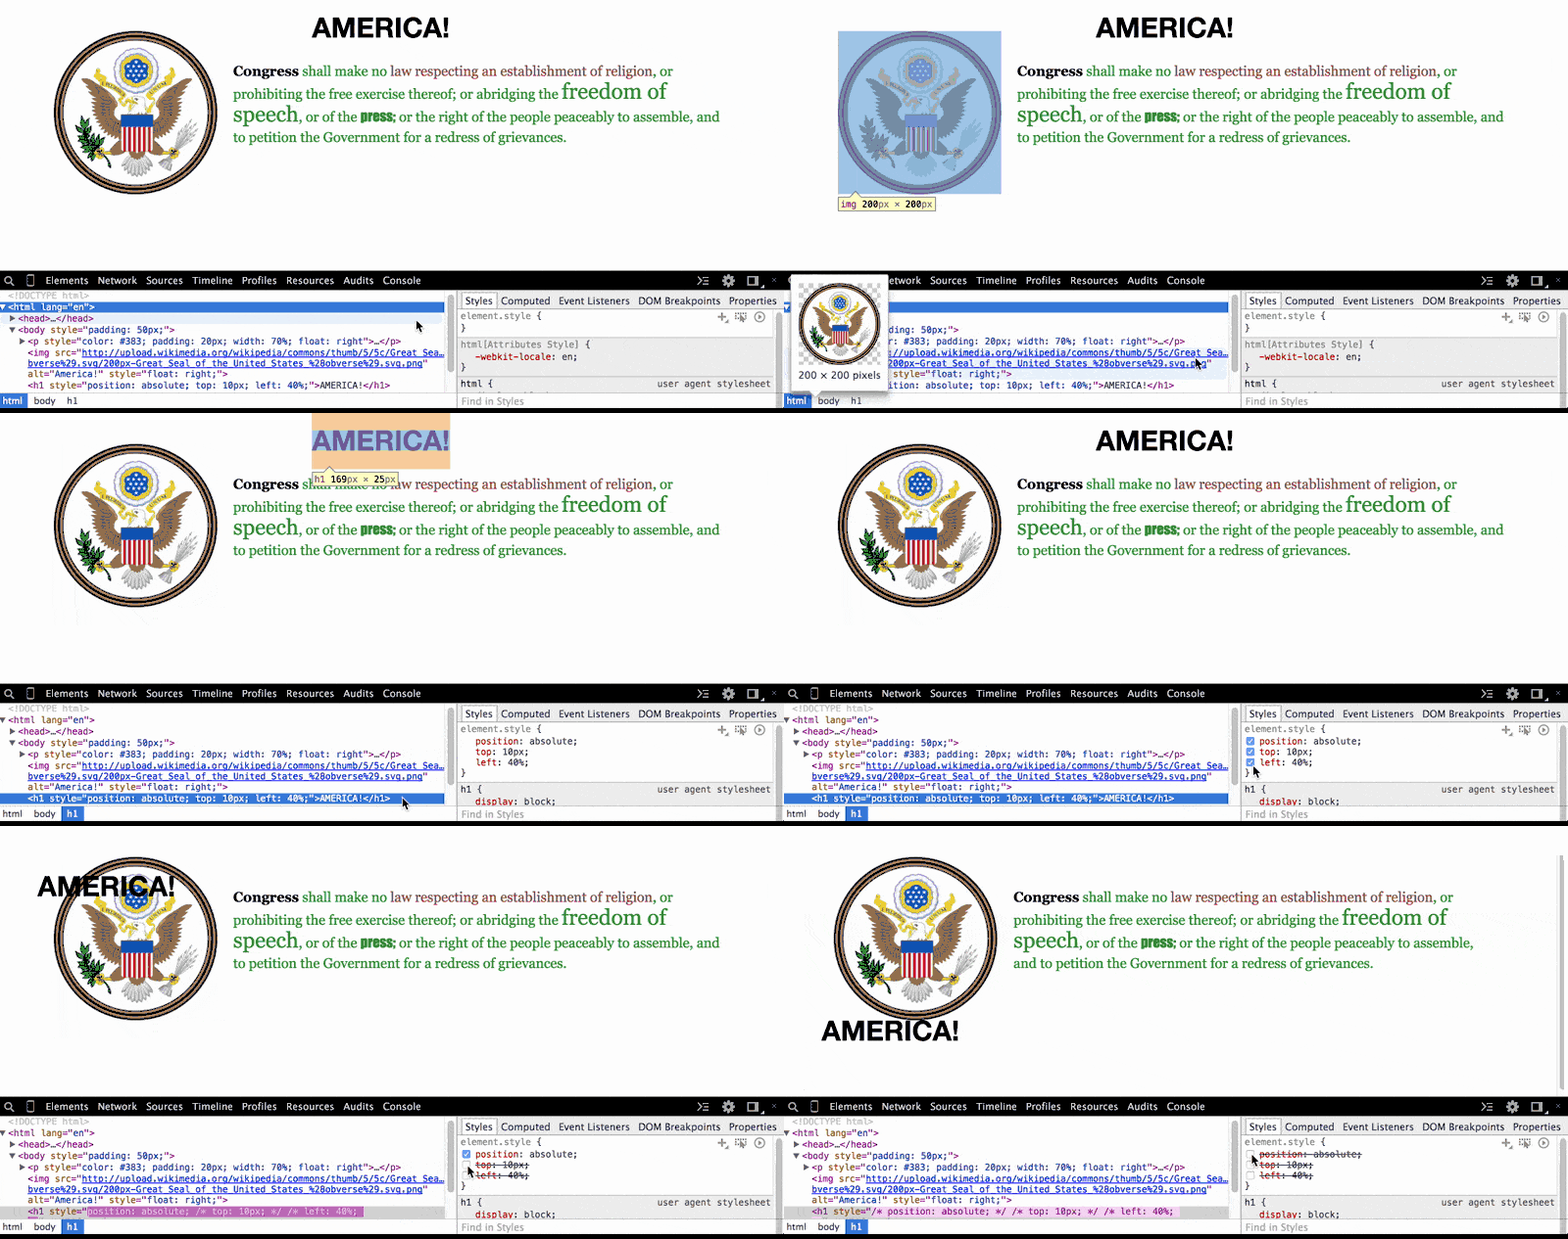
To reiterate an earlier point: HTML is not what-you-see-is-what-you-get when it comes to the visual display of a webpage. CSS is where the visual properties of each element are defined.
CSS selectors
For data programmers, the CSS syntax is not a huge priority to learn, unless you also want to build and design webpages. But let's assume you just want to collect data from webpages. Then, the relevant part of CSS is the concept of CSS selectors.
By understanding CSS selectors, we are able to write scraper code that can target specific groups of elements.
Tag name
We already know the most basic kind of selector: HTML tags.
To make all hyperlinks be green in color and in bold font, we use a has a selector:
a{
   color: green;
   font-weight: bold;
}
What if we wanted to target only a subset of hyperlinks, such as ones that were within <h2> elements? To express a nested-relationship, we simply list the tag names in ascending order:
h2 a{
   color: purple;
   font-weight: bold;
}
The Python code to target all hyperlinks within <h1> headlines and print their href attributes looks like this:
import bs4
import requests
soup = bs4.BeautifulSoup(requests.get('http://www.nytimes.com').text)
for link in soup.select("h2 a")['href']:
    print(link['href'])
The id and class attributes
Besides tag names, the id and class HTML attributes are also used to narrow target elements. Perhaps there are multiple groups of <h2> elements and we want to affect only a single class:
<h2 class="hit-me"><a href="/">Yes</a></h2>
<h2 class="not-me"><a href="/">No</a></h2>
The class attribute is specified in the selector syntax by using a period before the class name:
h2.hit-me a{
   color: purple;
   font-weight: bold;
}
The id attribute works the same way, except a pound sign is used in the selector syntax:
<h2 id="hit-me"><a href="/">Yes</a></h2>
<h2 id="not-me"><a href="/">No</a></h2>
h2#hit-me a{
   color: purple;
   font-weight: bold;
}
Scraping the headline selectors from nytimes.com
I didn't have the foresight to make a test page that clearly illustrated the use of id and class selectors, so I'll use a real-world example (as of April 2015, at least): the New York Times homepage at www.nytimes.com
This is what the HTML code on the NYT homepage looks like for the center headline:
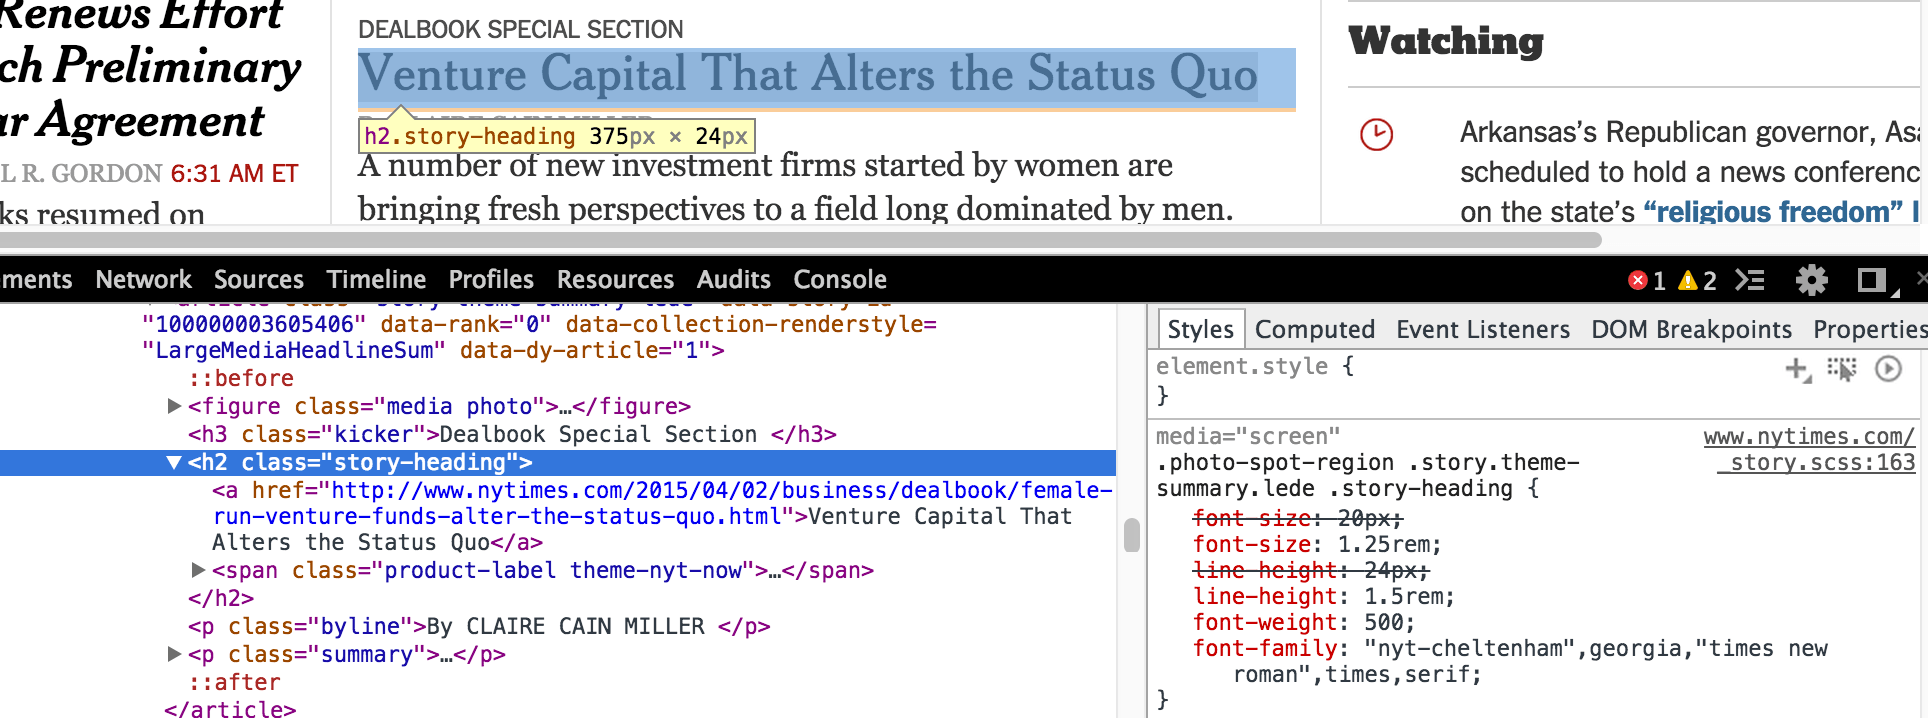
Now, if I wanted to get all of the main headlines, this CSS selector might work just fine:
h2.story-heading
import bs4
import requests
soup = bs4.BeautifulSoup(requests.get('http://www.nytimes.com').text)
links = soup.select("h2.story-heading")
# print out the number of links
print(len(links))
# 108
However, what if I want just the headline to the current front-center story? Check out the code listed in the Styles Pane to see a more specific selector:
.photo-spot-region .story.theme-summary.lede .story-heading
Let's just use part of that:
links = soup.select(".photo-spot-region .story.theme-summary.lede .story-heading")
# print out the number of links
print(len(links))
# 1
This tutorial is only meant to cover basics about CSS and not go into web-scraping, but hopefully you can see the relation the two concepts have. Learning CSS selectors, and the DOM tree concept overall, will make you a better scraper.
For more information, check out the Chrome DevTools tutorial on Editing Styles And The DOM Introduction